
February 2012 - W9KE
The 'Cheap Rotor Controller' software is compiled and loaded into the processor on your LaunchPad board with a program called 'Code Composer Studio' (CCS). This program is a an excellent program that sells for around $800. TI has a version that you can download for free that works fine for this project. It is has all the features of the full version and is limited only in the size of program you can work with. This limit is not even close to a problem for this project.
It is necessary to understand only a very small part of the CCS program to use it with the Cheap Rotor Controller project. I will show you the relatively small amount you need to know about CCS to compile and load a program into your LaunchPad. For this introduction we will be using a very small program that will flash a CW message on the onboard LED on the LaunchPad board. No additional hardware is required.
Step 1:
Code Composer Studio (CCS) uses the term 'Workspace' to refer to a location (folder) on your computer where your program(s) will be stored. There can be more than one workspace for CCS on your computer but CCS uses only one workspace at a time. To keep things simple you can put all your programs in one workspace.
We will create a workspace for our CW LaunchPad project. First create a directory on your computer for the workspace. For this example it will be 'C:\W9KE Launchpad'. After you have created the folder we will make it a CCS workspace. If you are brave you might want to use a different folder name/location.
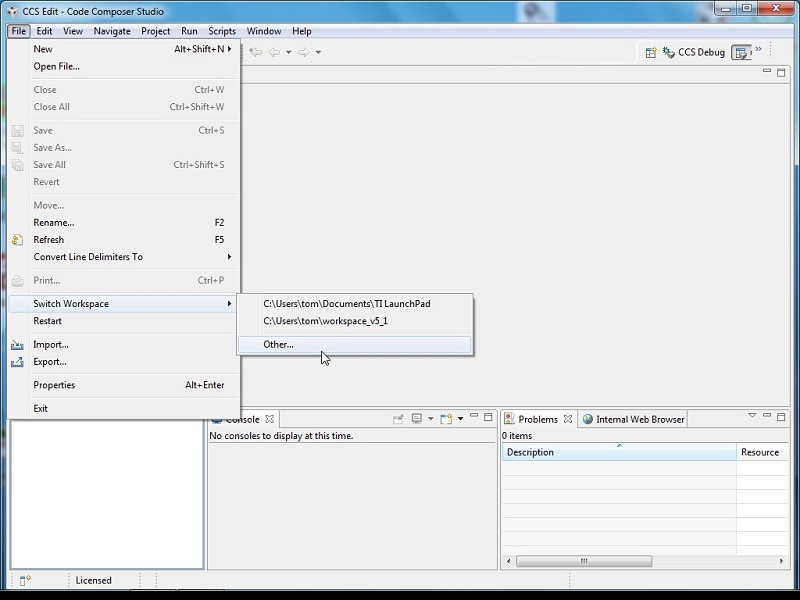
To turn our 'C:\W9KE Launchpad' folder into a CSS workspace we run the CCS program and select 'File -> Switch Workspace -> Other...' on the menu bar as shown in the image below.
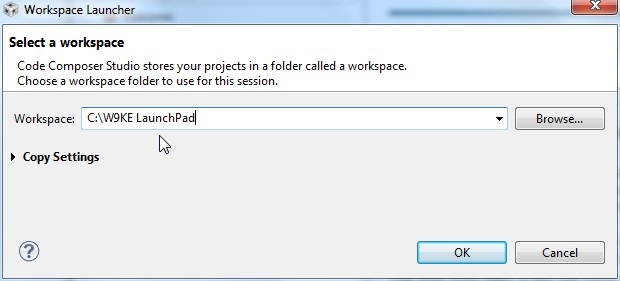
When you run the 'File -> Switch Workspace -> Other...' command the 'Workspace Launcher' window will open up. Click on the 'Browse' button and select the 'C:\W9KE Launchpad' folder you created earlier - then click on the OK button. This window is shown in the image below.
After you click the 'OK' button in the 'Workspace Launcher' window. A window like the one show below should open up. The reason I say 'should open up' is that TI may change things in their attempts to make it "easy to use".
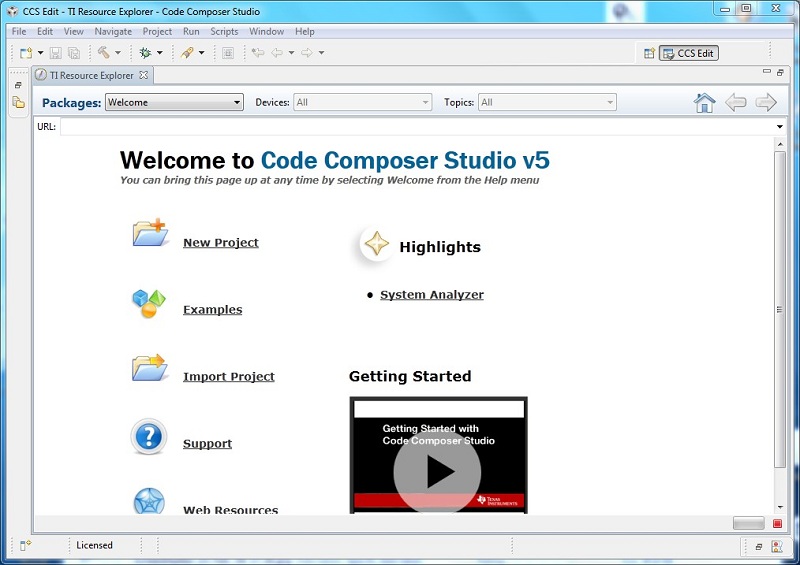
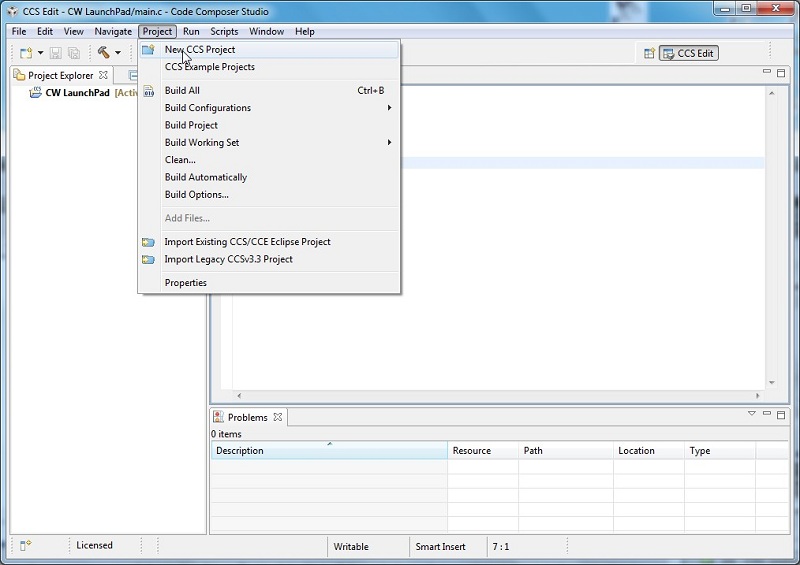
If the window shown above opens up click on 'New Project'. If the window shown above did not open simply select the 'Project -> New CSS Project' command from the menu bar as shown in the image below.
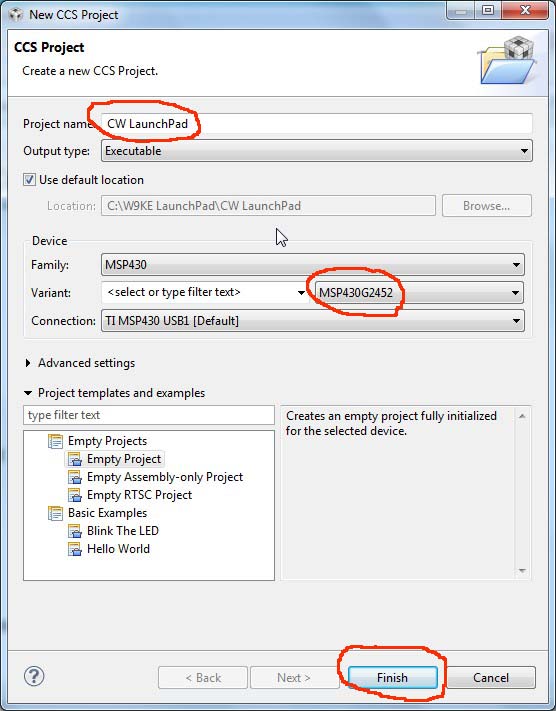
Now we set up our new project which will be stored in our 'W9KE Launchpad' workspace which is located in the 'C:\W9KE Launchpad' folder using the 'CSS Project' window shown below. This window will open up after you select 'New Project' or 'New CSS Project' using either of the two methods show above. The first thing to do is to set the 'Project Name'. In this example it has been set to 'CW Launch Pad'. Next we have to select the type of chip we are using. TI has been upgrading the chip(s) they ship with the LaunchPad so it is impossible to know what chip you may have received. Look at the only DIP package chip on the LaunchPad and read the chip number printed on the chip. It should start with 'MPS430' followed by a letter, followed by some numbers (usually 4 digit numbers). In this example the chip on the board is a MPS430G2452. After you have entered the 'Project Name' and Chip Number click on the 'Finish' button.
After you click on the 'Finish' button you should see a screen that looks like the one shown in the image below. If you do not see a 'Project Explorer' panel click on 'View -> Project Explorer' on the CSS menu bar.
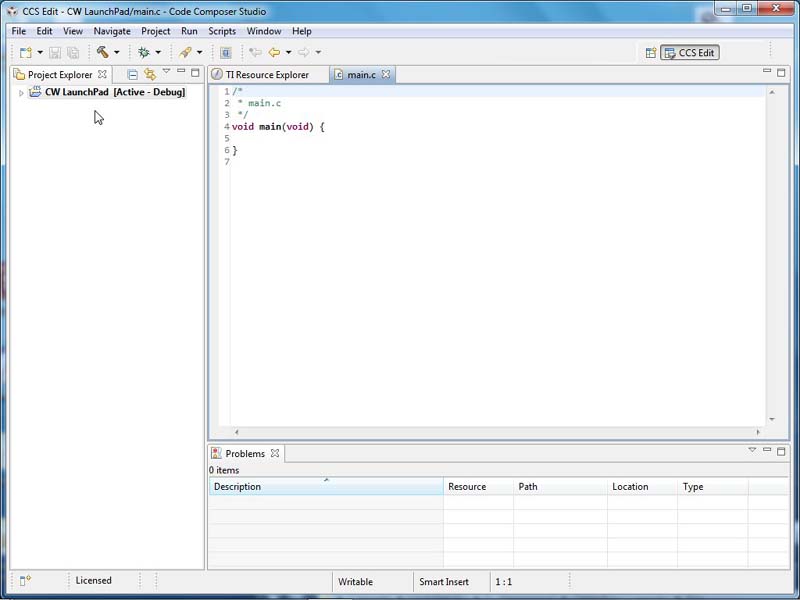
Congratulations - you have setup your Workspace and created the 'CW LaunchPad' project within that workspace. If you go and look at your 'C:\W9KE Launchpad' folder you will see that a folder 'CW LaunchPad' has been created and there are a number of files in that folder. The CSS program is displaying the contents of the main.c file which was created when you set up the project. For the 'CW LaunchPad' project this is the only file you will need to deal with. Try closing the CSS program and then run it again. It should open up to this same screen as shown above.
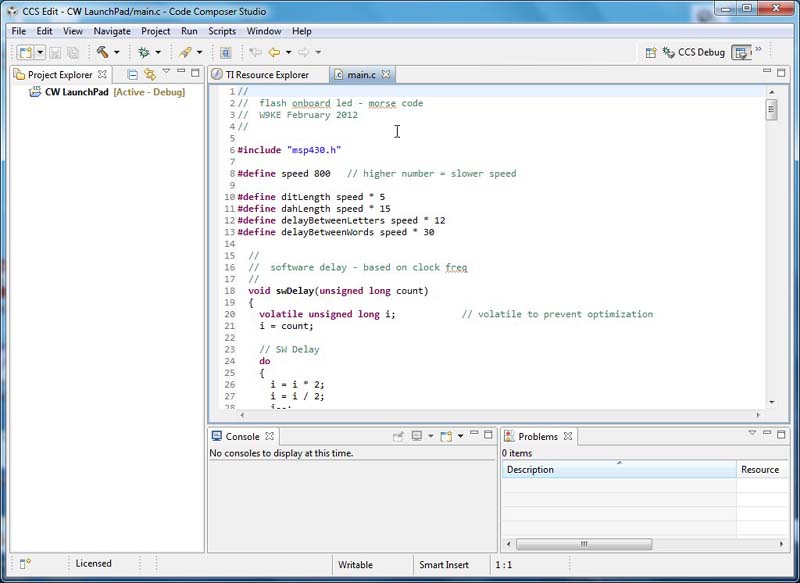
The 'main.c' file you see in the image above is a very basic program that does nothing. We will replace the 'main.c' file in the 'C:\W9KE LaunchPad\CW LaunchPad\' folder with the CW program main.c file. Close the CSS program and then click on the 'CW main.c Zip File' link and download the zip file. Unzip the file into the 'C:\W9KE LaunchPad\CW LaunchPad\' folder. When asked if it should replace the existing 'main.c' file click OK. Run the CSS program and you should see a screen that looks like the image below. The CW program has now been loaded and all that remains is to compile and load the program into your LaunchPad board.
Step 2:
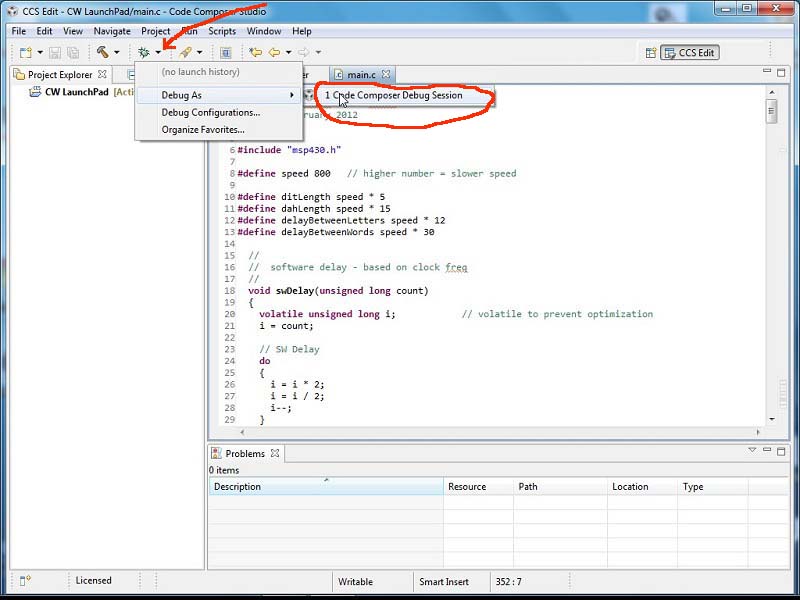
Connect your LaunchPad board to a USB port on your computer. Make note of the USB port you connect your LaunchPad to and always connect it to that same port when using the CCS program. A little green LED by the USB connector should come on when the board is connected to the USB port. Click on the down arrow just to the right of the bug icon as shown in the image below and select 'Debug As -> Code Composer Debug Session'.
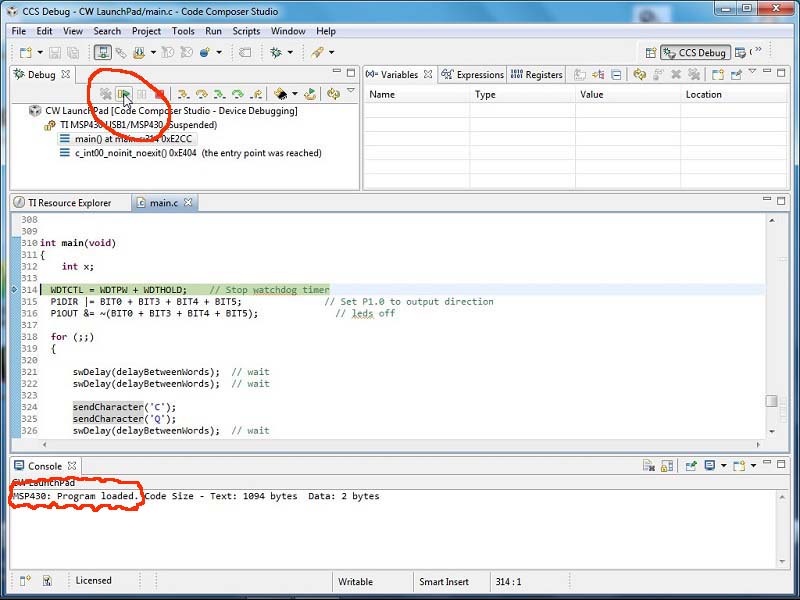
The program has now been loaded into the LaunchPad and is almost running. A message at the bottom of the screen shown below shows the fact that the program has been loaded. All that is left is to click on the little green right pointing arrow with the yellow bar to its left. You should now see a CW message blinked out on the LED on the LaunchPad board. If you know the Morse code you can try to read the message.
The 'CW LaunchPad' program has been burned into the chip on your LaunchPad board. You can shut down the CSS program and unplug the USB cable that is connected to the LaunchPad board. When you plug the USB cable back in the program will start up and flash the CW message. The LaunchPad is using the USB connection only for power. You can connect your LaunchPad to a simple USB charger and your CW program will flash away.
If you run the CSS program again and scroll down to the bottom of the main.c file you will see the following lines. These lines determine the CW message that is blinked out. Try changing the message by changing the letters enclosed between the single quotes. Save the file and repeat the steps outlined above starting at 'Step 2:'. It is very important to learn the procedure to change the program and load it into the LaunchPad so try changing the message a few times until you are comfortable with it.
sendCharacter('C');
sendCharacter('Q');
swDelay(delayBetweenWords);  // wait

sendCharacter('C');
sendCharacter('Q');
swDelay(delayBetweenWords);  // wait

sendCharacter('C');
sendCharacter('Q');
swDelay(delayBetweenWords);  // wait

sendCharacter('D');
sendCharacter('E');
swDelay(delayBetweenWords);  // wait

sendCharacter('W');
sendCharacter('9');
sendCharacter('K');
sendCharacter('E');
swDelay(delayBetweenWords);  // wait

sendCharacter('W');
sendCharacter('9');
sendCharacter('K');
sendCharacter('E');
swDelay(delayBetweenWords);  // wait

sendCharacter('K');
If you CW skills are rusty or non-existent you can slow down the speed of the CW by changing the line at the beginning of the main.c file that looks like this. Increase the number 800 to slow down the CW speed.
#define speed 800 // higher number = slower speed
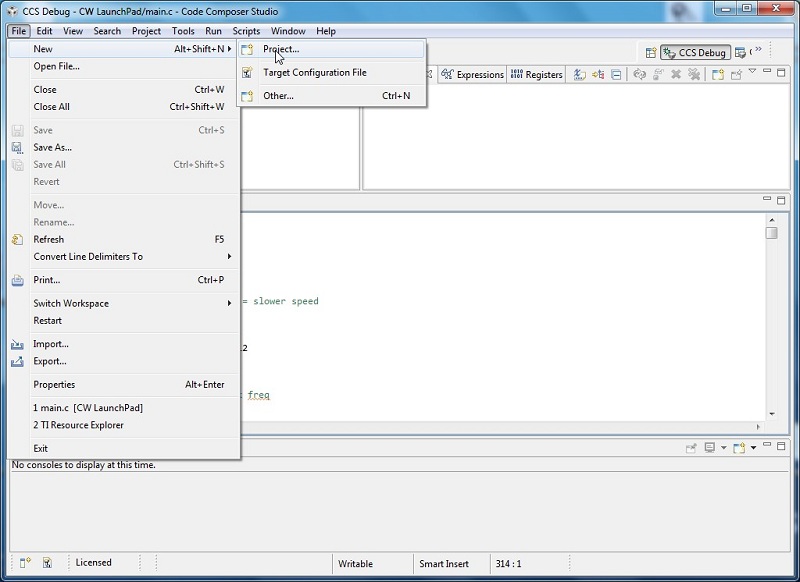
AFTER you have mastered the steps in modifying, compiling and loading the CW program you can move on to the rotor control program. Run CSS and select 'File -> New -> Project' from the menu bar as shown in the image below.
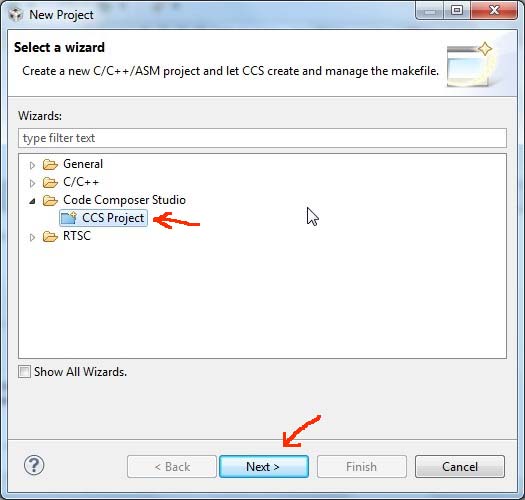
Select 'CCS Project' as shown in the image below and click on the 'Next' button.
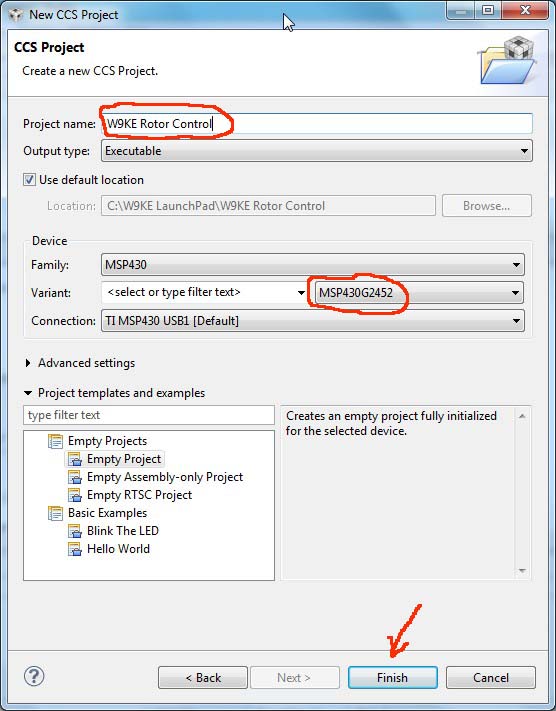
The window shown below will open. Use it to set up a project for your rotor control program. This is the same as when we set up the project for the 'CW LaunchPad' project. For the example shown in the image below I called the project 'W9KE Rotor Control'. The chip type will be set to the same chip type you set in the 'CW LaunchPad' project. If you did not complete the CW project I highly encourage you to go back and finish it.
After you have set up your project for the rotor control download and unzip the files contained in the file listed below.
Copy ALL the files from the zip file into the folder for your rotor control project. For the example I am using that would be 'C:\W9KE LaunchPad\W9KE Rotor Control\' . In the same way a basic 'main.c' file was created for your 'CW LaunchPad' project a basic 'main.c' file was created for your rotor control project. When you copy all the files from the zip file into your rotor control folder the existing 'main.c' file should be over written. The rotor control program is compiled and loaded into your LaunchPad board the same way it was in the 'CW LaunchPad' project.
During the rotor calibration procedure you will make changes to files the same way you made changes to the CW message in the 'CW LaunchPad' project.
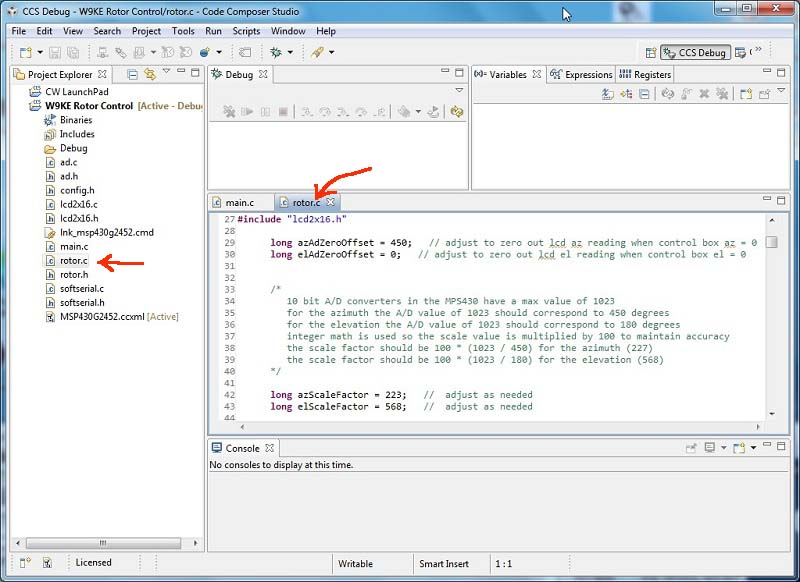
If you do not see a 'Project Explorer' panel click on 'View -> Project Explorer' on the CSS menu bar. This will open up a window that lets you see all the projects/files in your workspace. Click on the little arrow to the left of the project name in the 'Project Explorer' window to see and select files contained in a project. In the image below you can see the 'Project Explorer' panel displaying the 'W9KE Rotor Control' project files. The 'rotor.c' file was clicked on in the 'Project Explorer' panel to open it for changes that may be needed when calibrating your rotor.
Words of encouragement from G4ILO
73 W9KE Tom Doyle